How to Use Your SnowPeeler Roof Rake
Clearing your roof doesn’t have to be complicated. The SnowPeeler was designed to make snow removal faster, safer, and easier — all from the ground.
Follow these simple steps to get the best performance and keep your roof clear all winter long.

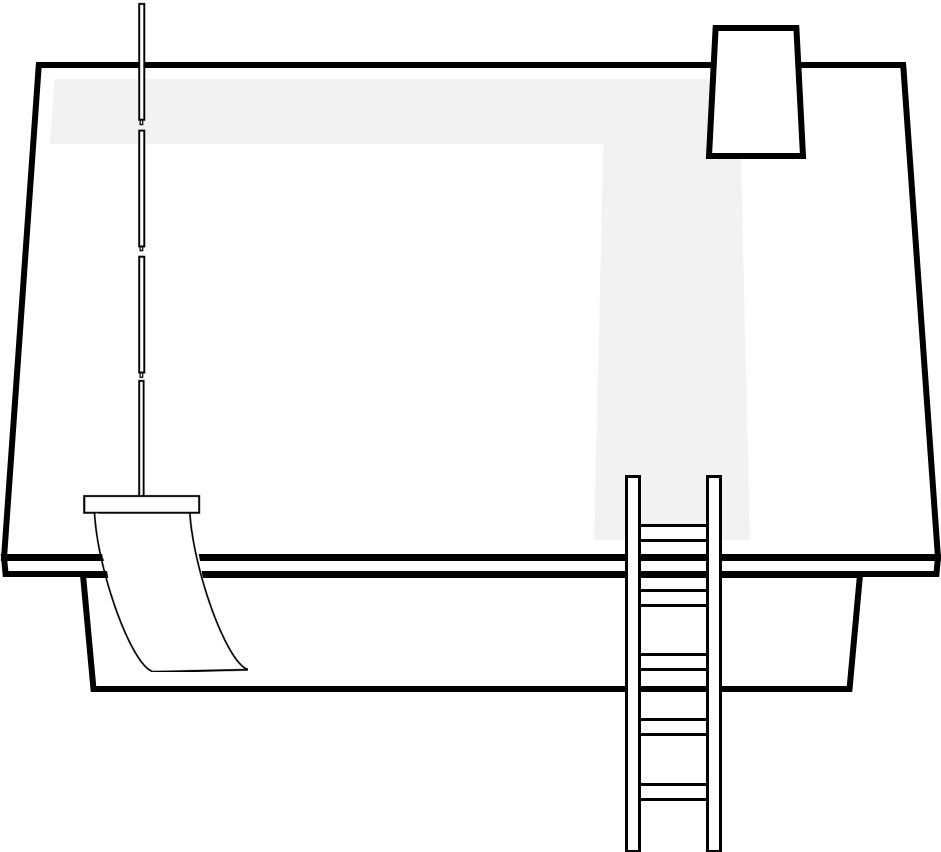
GROUND LEVEL SNOW REMOVAL
Stay safely on the ground while removing snow quickly and efficiently.
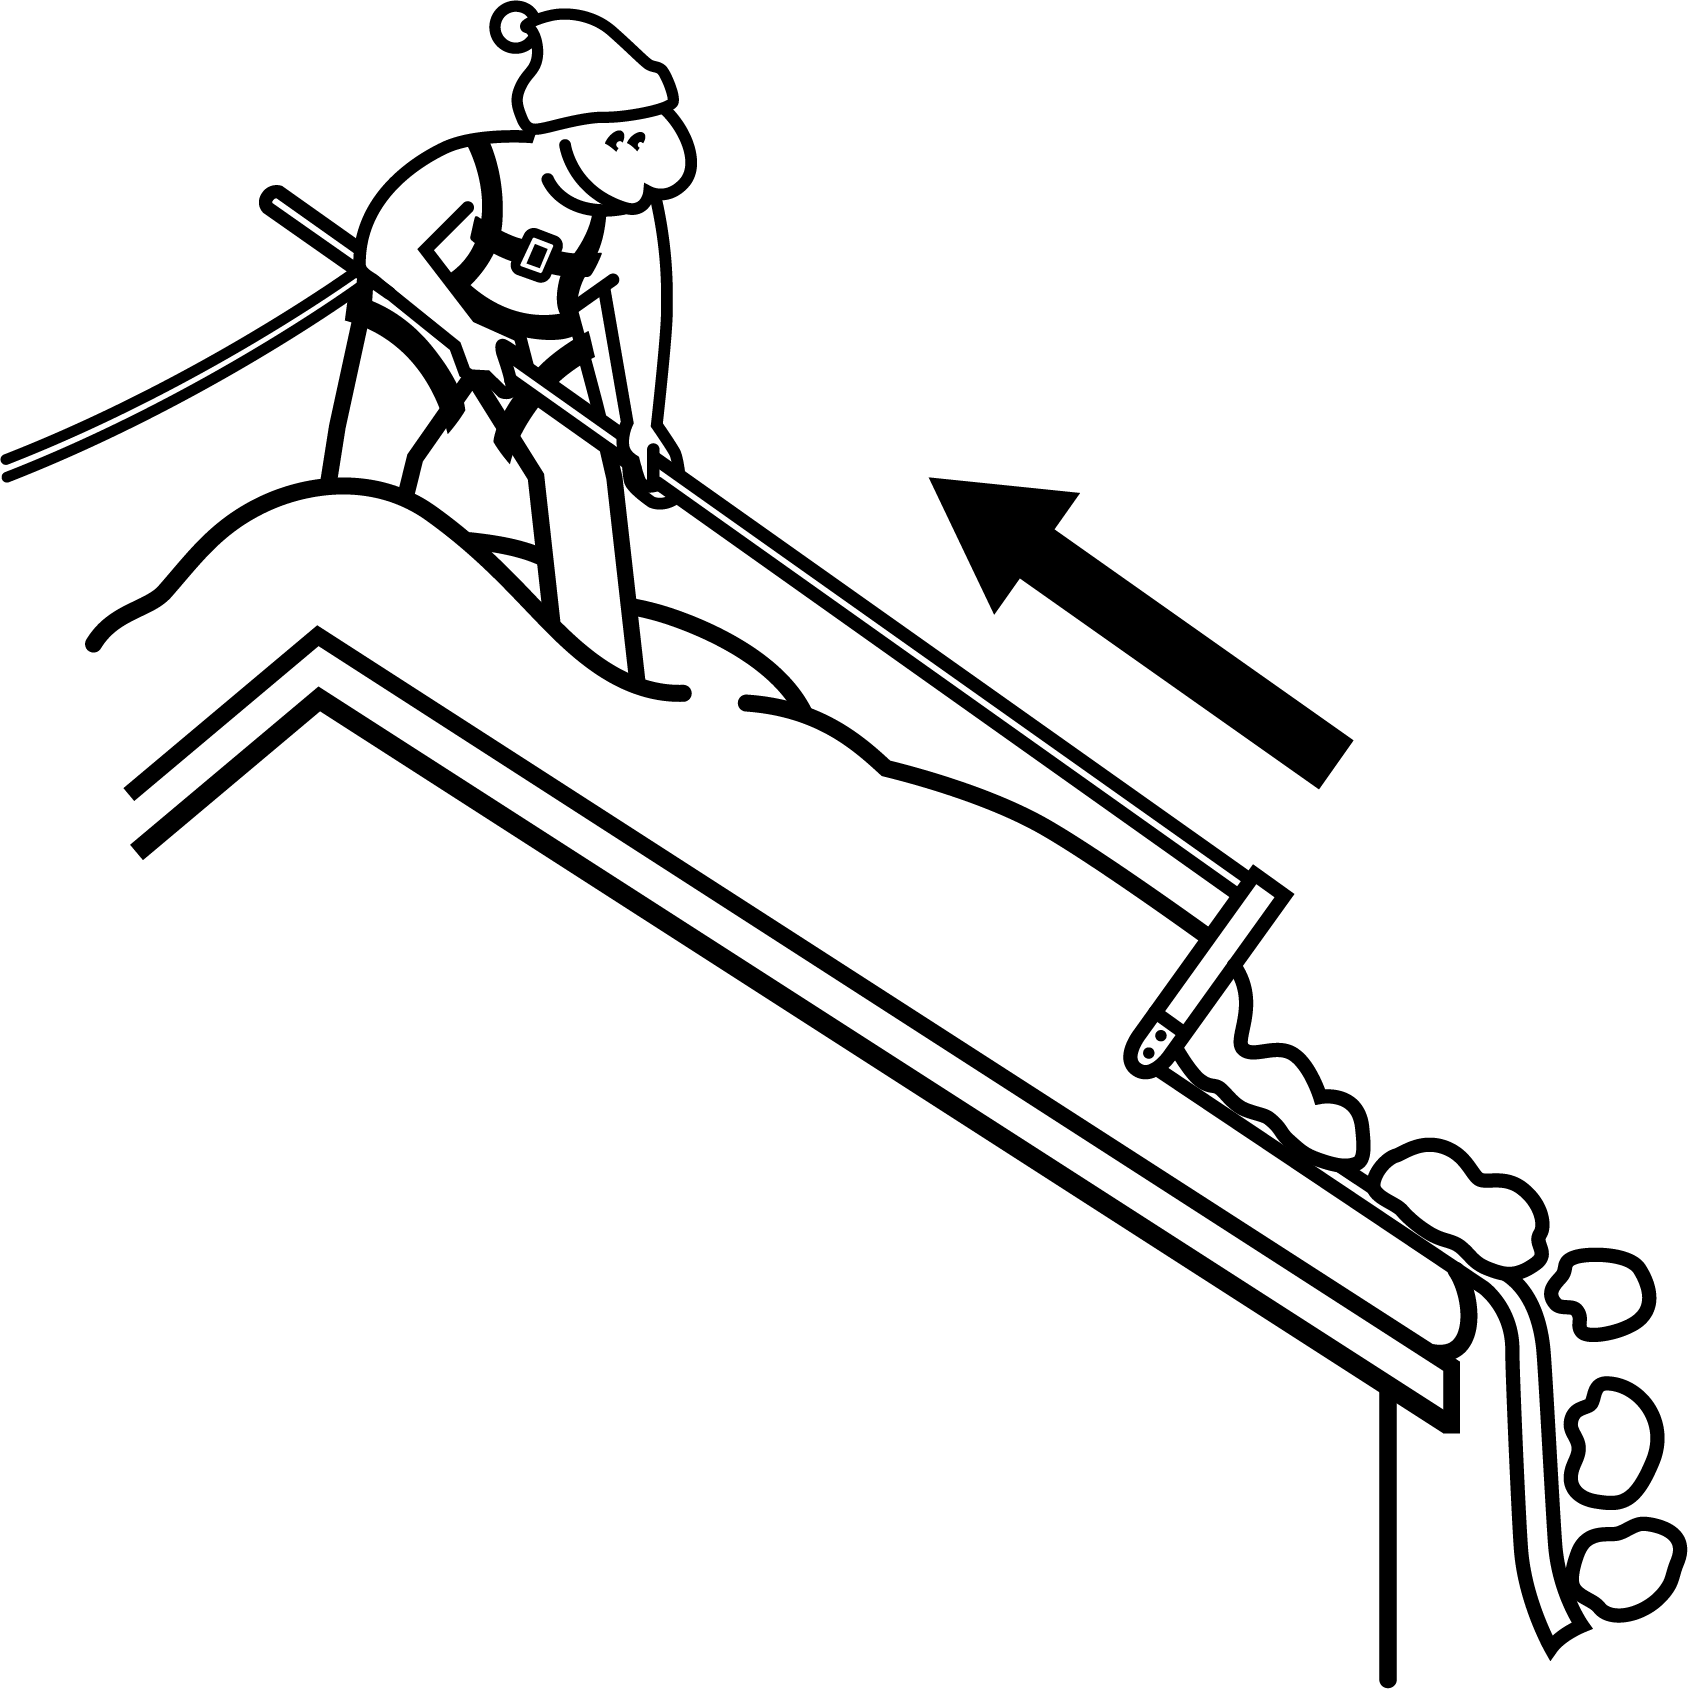
Start by unrolling the snow slide and attaching the first pole sections to reach the lower edge of your roof. Work in small sections — push the cutting frame upward to slice through the snow and let it slide down effortlessly.
Add more poles as you move higher up the roof, and clear one strip at a time until the surface is clean. No ladder, no climbing — just smooth, fast snow removal.
Before Use
Roll out the snow slide on your SnowPeeler roof rake before going outside. At temperatures drop below -10° C (14° F), the slide may stiffen making it difficult to unroll.
GROUND LEVEL CONFIGURATION

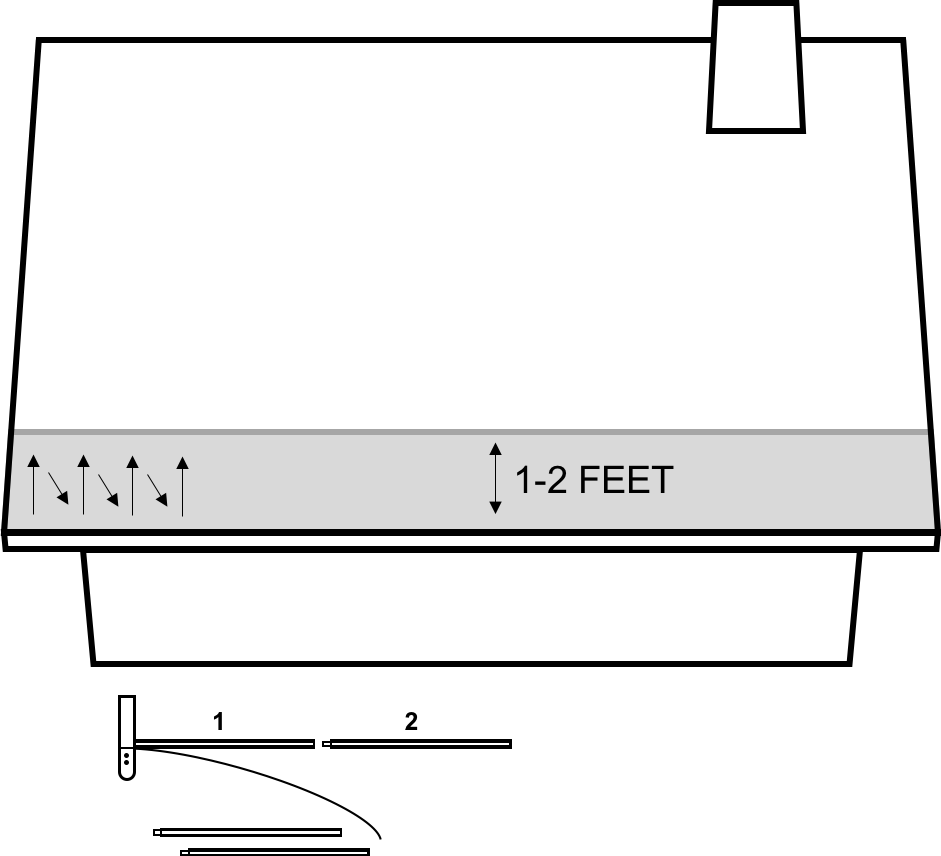
Only connect the number of pole extensions necessary to reach the first 1-2 feet of snow on the lower edge of your roof.
This will minimize the weight of your SnowPeeler and reduce the effort required in this initial stage. Place the extra pole extensions nearby within reach. Do not stick the pole extensions end-first into snow drifts. Snow may clog the openings causing difficulties with the snap spring connectors.
STEP ONE
Clear the top 60 centimeters of snow closest to your gutters. This step is crucial because it provides working space to maneuver your SnowPeeler roof rake sideways, which will make clearing snow from the upper section of your roof easier.
STEP TWO
Starting at the edge of your house, clear snow 5 feet at a time using upward strokes and moving laterally across the roof. Do not try to clear the entire upward length of your roof by adding all of the pole extensions when you start. This will require more effort over time in that the weight of your SnowPeeler is not optimized. You may also find that the end of your SnowPeeler is hitting the ground more frequently as you have to pull it back all the way to reach the bottom of the roof.

STEP THREE
Once you’ve cleared a 5-foot section, add an extension pole and begin to remove the next 5 feet. Repeat this step until you’ve reached the peak of your roof or you’ve added all of your available pole extensions (30-feet is generally the limit).
Additional Tips for Using Your SnowPeeler Roof Rake
Current versions of SnowPeeler roof rake Classic and SnowPeeler Premium are equipped with an elastic slide attachment. The purpose of the slide attachment is to minimize drift in windy conditions and to ensure the snow slide will always be aligned with the sectional handle.
The slide attachment consists of a slotted pole handle and an elastic slide attachment. The slotted pole handle is configured as the 3rd extension in the sectional handle. The elastic slide attachment is connected to the slot in the handle and the grommet in the tail of the slide.
To avoid being covered with snow when using the slide attachment, move the handle in a slight lateral direction to ensure the snow falls to the ground before reaching you.

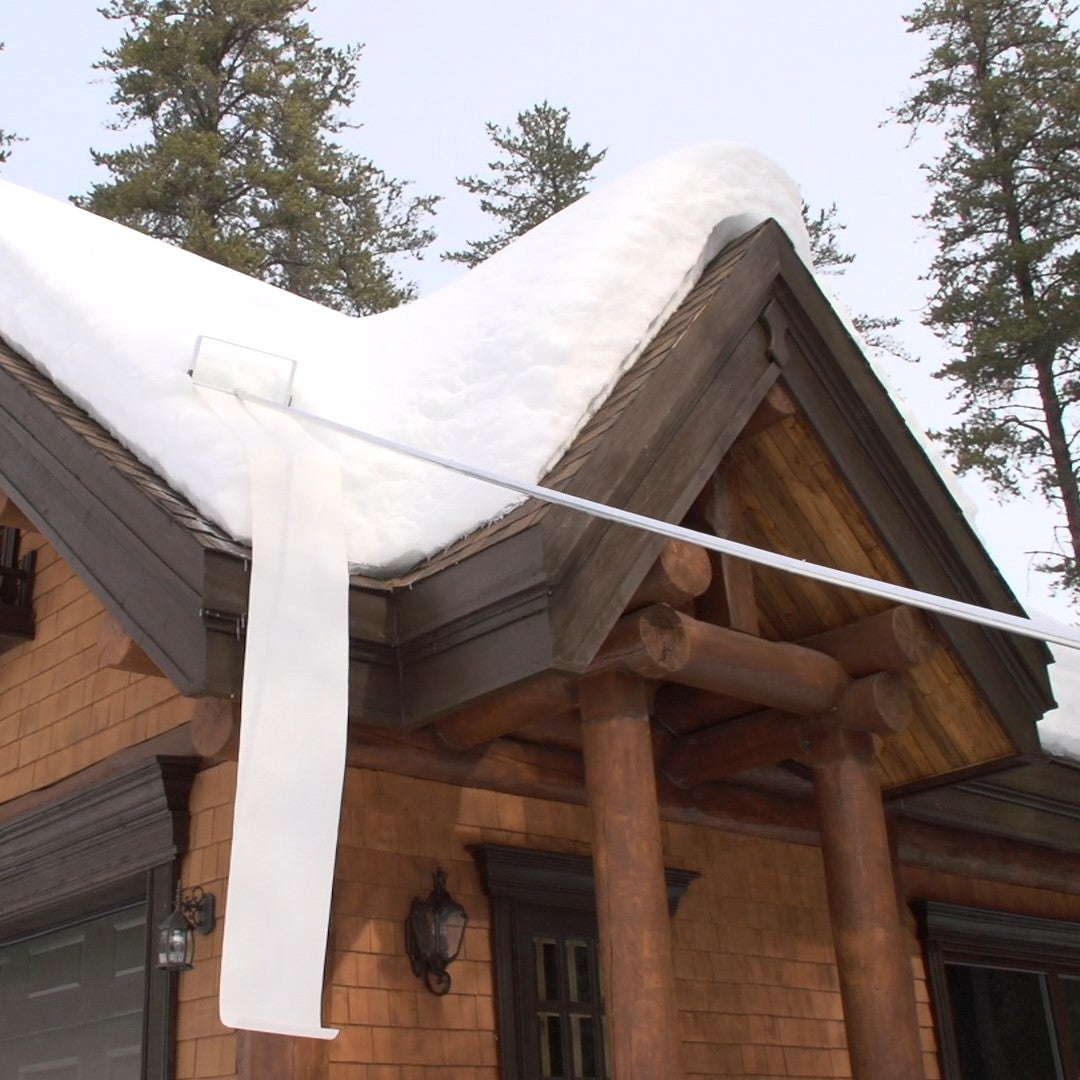
ROOF LEVEL SNOW REMOVAL
For those who prefer to work directly from the roof, the SnowPeeler can easily adapt.
Before climbing, make sure you’re using proper safety gear and stable footing. From the rooftop, hang the snow slide over the eaves and pull the cutting frame toward you to clear the snow in smooth, controlled sections.
The snow slides naturally off the roof, reducing effort and the risk of damage — ideal for larger roofs or heavy accumulations.
Before Use
Roll out the snow slide on your SnowPeeler roof rake before going outside. At temperatures drop below -10° C (14° F), the slide may stiffen making it difficult to unroll.
ROOF LEVEL CONFIGURATION

The SnowPeeler’s patented reversible cutting frame lets you remove snow efficiently from the ground or directly from the roof.
When used from the roof, the pole attaches to the top of the cutting frame, on the side opposite the snow slide. The slide hangs down along the roof edge, and you simply pull the cutting frame toward you to let the snow slide off.
For best results when working on the roof, use the SnowPeeler Premium, which includes a 4.5 m slide with a weighted end. This extra length ensures the snow clears the gutters easily. If you own the standard SnowPeeler (2.75 m slide), you can add the XL Slide Extension Kit for full coverage.
To switch from ground to roof configuration:
- Unscrew the frame adapter from the bottom of the cutting frame (no need to remove the pole).
- Reattach it to the top inside edge of the frame, with the pole handle facing away from the slide.
- Tighten both screws gently using a 5/32 in. hex key — avoid over-tightening.
Once set, your SnowPeeler is ready for rooftop use — efficient, safe, and easy to handle.
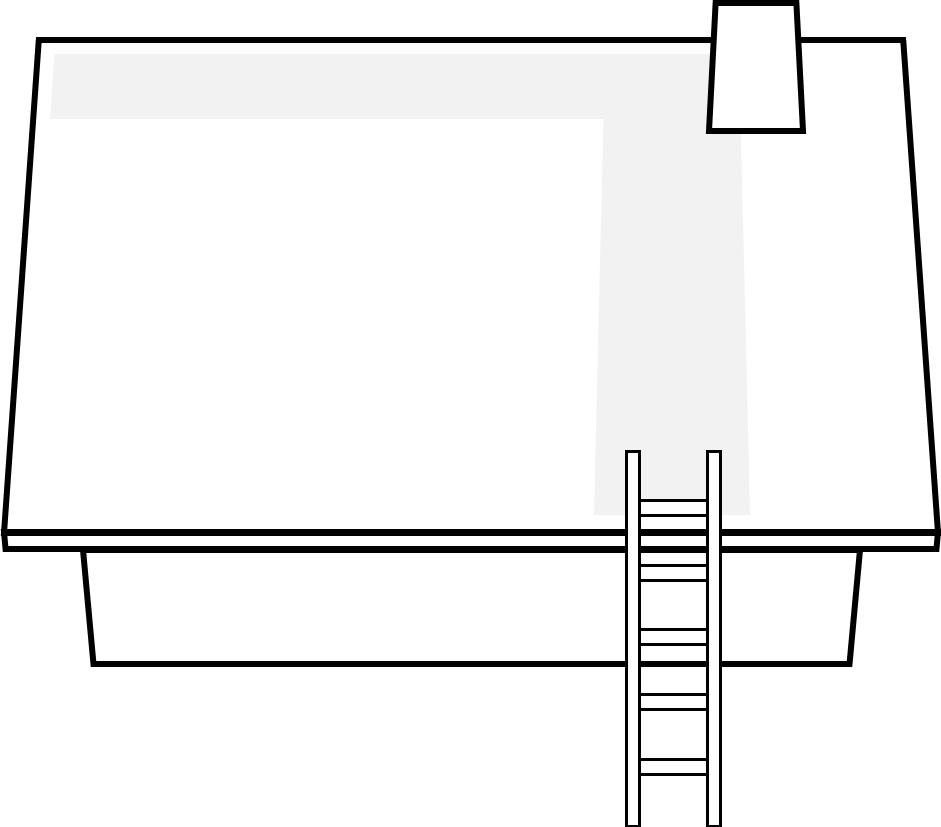
STEP ONE
To safely use your SnowPeeler from the rooftop, you must first clear a path to the peak and across the roofline. This starts with careful placement of your ladder. You’ll want to make sure it is on firm, level ground away from power and utility lines. In addition, always let someone know that you will be working on the roof and ask them to check up on you. If possible, have them “spot” you while you’re on the roof.
STEP TWO
Once you’ve cleared an access path, you’ll want to carry your SnowPeeler to the roof unassembled. Once all of the components are on the roof, you will want to secure yourself to the roof with your safety harness.
If possible, roll out the slide on your SnowPeeler before going outside. At temperatures drop below -10° C (14° F), the slide may stiffen making it difficult to unroll.
STEP THREE
To effectively remove snow while working from the roof, the slide must be hanging over the lower eave or gutter. You will want to connect the number of pole extensions that will enable you to reach the lower edge of the roof from the peak.
STEP FOUR
With the slide hanging over the edge, pull the cutting frame towards you. Moving in a lateral direction, repeat these steps until your roof is cleared. Depending on the distance from your roof’s lower edge to its peak, you may want to consider purchasing the Handle Extension Kit – 10 ft. and the XL Slide Kit – 15 ft. to ensure your safety and optimize the effectiveness of your SnowPeeler.